A Guide to Installing a Metal/Colorbond Roof
A roof is one of the most important parts of a house. It protects you from the elements and keeps your home insulated. A metal roof is a great option for those looking for a durable and long-lasting roofing solution. In this guide, we will walk you through the process of installing a metal roof. From materials to tools, we will cover everything you need to know to get the job done right.

What is a metal/colour bond roof?
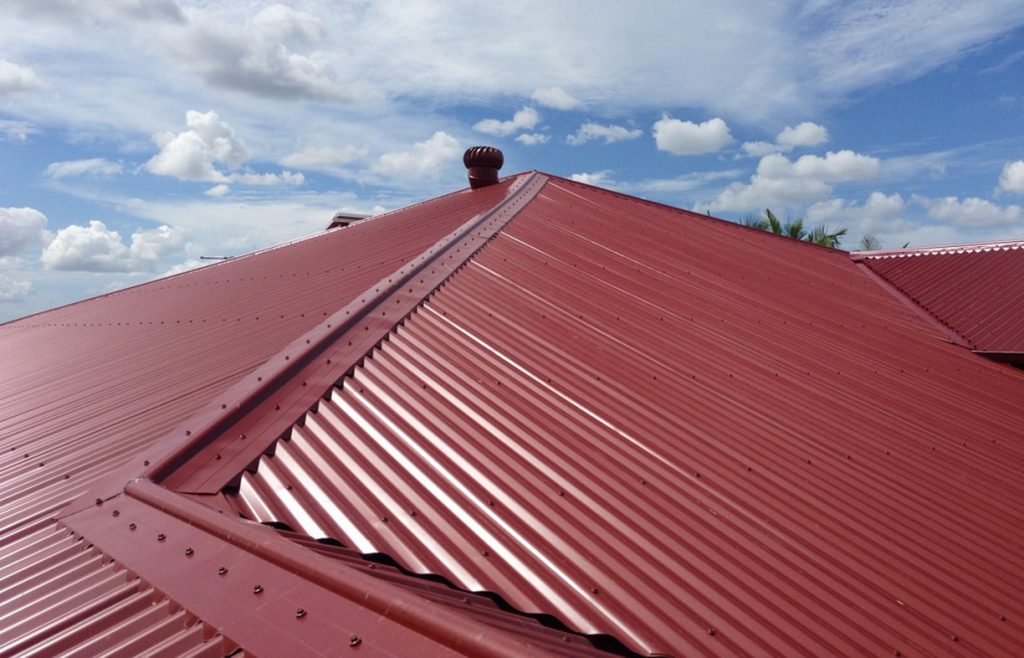
A metal/colour bond roof is a type of roofing that uses metal or steel sheets, galvanized steel, and steel panels as the main material. The sheets are usually coated with a layer of zinc to protect against corrosion, and they can be painted in a variety of colours. Metal roofs are known for their durability and low maintenance requirements, and they can also help to reduce energy costs by reflecting heat away from the building.
The benefits of a metal/colour bond roof
A metal/colour bond roof is an excellent choice for any home. There are many benefits to installing a metal/colour bond roof, including the following:
- A metal/colour bond roof is extremely durable. It can withstand high winds and severe weather conditions, making it an ideal choice for any climate.
- A metal/colour bond roof is also fire resistant. This makes it a great choice for any home, especially those located in areas at risk for wildfires.
- Metal roofs are also energy efficient. They reflect heat away from the home, keeping it cooler in the summer and warmer in the winter. This can lead to significant savings on energy bills.
- Metal roofs are low maintenance. They do not require painting or other regular maintenance, making them a great choice for busy homeowners.
- Metal roofs add value to your home. They are considered a premium roofing material and can increase the resale value of your home should you ever decide to sell it.
How to install a metal/colour bond roof
Installing a metal or colour bond roof is a relatively simple process that can be completed in a few hours with the help of a few friends. The first step is to measure the area you need to cover and then cut the metal sheets to size.
Next, you will need to attach the sheets to the roof using screws and washers. Once all of the sheets are in place, you will need to seal around the edges with caulk or another sealant. Finally, you will need to paint or stain the roof to protect it from the elements.
Metal/Colorbond roof installation tips
- Make sure you have the correct tools for the job. You will need a ladder, a hammer, nails, and a saw.
- Measure your roof before you start so you know how much material you will need.
- Start by nailing the first course of roofing material to the edge of the roof. Work your way up, overlapping each course as you go.
- Be sure to seal all seams and joints with caulk or roofing tape to prevent leaks.
- Finish by trimming off any excess material with a saw and applying a final coat of sealant.
What You Need to Know Before Installing a Metal Roof
metal roofs are a great way to protect your home from the elements. They’re also very durable and can last for many years with proper care and maintenance. However, there are a few things you should know before installing a metal roof. Here’s what you need to know:
- Make sure your roof is properly ventilated. Metal roofs can get very hot in the summer, so proper ventilation is essential to prevent heat build-up and damage to your home.
- Be sure to seal all seams and fasteners. Sealing all seams and fasteners will help keep water out and prevent rusting or corrosion.
- Inspect your roof regularly. Inspecting your roof regularly will help you catch any problems early on and prevent serious damage down the road.
Installing a Metal Roof
Installing a metal roof is a big job that requires the help of a professional roofing contractor. Metal roofs are very heavy, so it’s important to make sure that your home can support the weight of the roof before you begin the installation process.
Once you’ve determined that your home can support a metal roof and metal panels, the next step is to choose the type of metal roofing material you want to use. There are several different types of metal roofing materials on the market, so it’s important to do your research and choose the material that best suits your needs.
After you’ve selected the type of metal roofing material you want to use, it’s time to start the installation process. The first step is to remove any existing roofing material from your home. This can be a daunting task, so it’s important to work with a professional roofing contractor who has experience removing old roofs.
Once the old roofing material has been removed, the next step is to install the new metal Roof. This process will vary depending on the type of metal Roof you’ve selected, but most metal roofs are installed using screws or nails. It’s important to follow the manufacturer’s instructions carefully when installing a new metal roof, as improper installation can void your warranty.
After your new metal Roof has been installed, it’s time to enjoy your brand-new energy-
How to install Colorbond roof: step by step
It is important to have the right tools and materials for the job before beginning any roofing project. For a Colorbond roof, you will need a ladder, tape measure, chalk line, hammer, screw gun, drill bit, impact driver, tin snips, sealant gun and cartridges, utility knife, circular saw with a metal cutting blade, safety goggles, respirator mask, gloves, and ear protection. You will also need to purchase your Colorbond roofing sheets in the desired colour and profile.
Once you have gathered all of your materials, you can begin installing your new Colorbond roof. The first step is to measure the length and width of your roof so that you know how many sheets you will need to purchase. Next, use the chalk line to mark out where the sheets will be cut to size. Using the tin snips, cut the sheets along the marked lines.
Now it is time to install the screws that will secure the sheets in place. Begin by attaching screw hooks along the edges of the roof. Once all of the hooks are in place, lift each sheet into position and secure it with screws. Be sure to use sealant around each screw to provide extra protection against leaks.
Finally, trim off any excess material around the edges of the roof using the utility knife. Once all of your sheets are in place and trimmed to size, sit back and enjoy your new Colorbond roof!
Safety considerations for installing Colorbond roof
When installing a Colorbond roof, there are a few safety considerations to keep in mind. First, make sure that you have the proper equipment and supplies for the job. Second, be aware of your surroundings and take precautions to avoid injury. Third, always follow the manufacturer’s instructions carefully.
Colorbond roofs are extremely strong and durable, but they are also very heavy. Make sure that you have the proper equipment to safely support the weight of the roof during installation.
The installation process can be dangerous if you’re not careful. Be aware of your surroundings and take precautions to avoid injury. Always follow the manufacturer’s instructions carefully.
If you have any questions or concerns about safety during the installation process, consult with a professional roofing contractor before beginning the job.
Conclusion
We hope that this guide has helped provide you with all the information you need to know about installing a metal/Colorbond roof. If you have any questions or would like to share your experiences with installing a metal/Colorbond roof, please leave us a comment below. We would love to hear from you!


